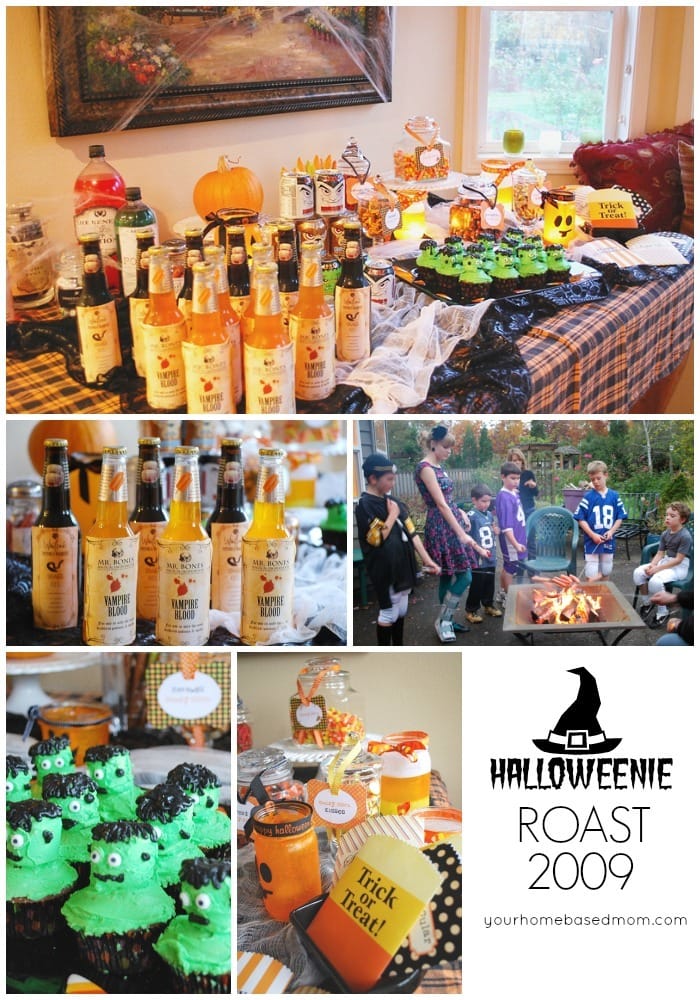
Last night we hosted a Halloweenie Roast for some of our neighbors. I am so glad my neighbors still have younger children!
This will be the first Halloween I haven’t had to help one of my children come up with a Halloween costume – Tessa will be hanging out with friends but no costumes! Fortunately my neighbors enjoy borrowing the dozens of costumes I have stored away in the costume boxes in the attic. Years worth of fun homemade costumes to share! This year Olivia is going to make good use of the Wilma Flintstone costume I made!
I am sure many of you are busy getting ready for the big night tonight but I wanted to share some fun pictures from our Haloweenie Roast last night. Maybe you can store away a few of the ideas and use them next year.
I found these cute digital download candy goodie bags here. I just printed them off on my computer and taped them together – so cute!
These fun chocolate fingers were a big hit too! I found the candy mold at Michaels and just used different colored Wilton Melts to create the fingers on a pretzel rod!
I saw this fun idea over at The Idea Room for a Creepy Halloween Apothecary. I was able to create it using bottles out of my pantry and a couple I picked up at Goodwill. Amy shares the link to print off the great labels in her post.
I also used the labels to cover the rootbeer and orange soda bottles. This was the adult beverage at the party.
For the kids I found these darling little cans of soda at Target.
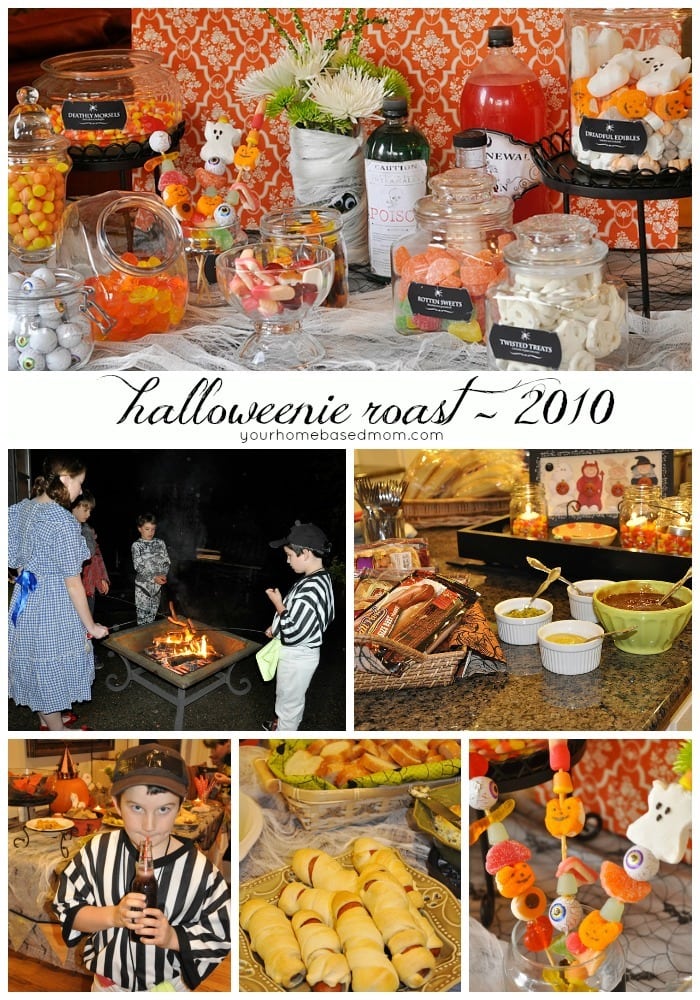
I covered the table with an orange and black tablecloth I had. I had picked up a piece of spiderweb yardage at the fabric store during the week – it was 50% off and then used a piece of cheesecloth that I stretched and tore a bit on top of that.
The kids and adults had a great time roasting their hot dogs on the portable fire pit on the patio. We decided not to use the in ground fire pit that is at the back of the yard because we had quite a bit of rain this past week and it was a bit muddy!
In addition to the regular hot dog condiments I also made some Coney Sauce for the dogs that was yummy. Neighbors pitched in with the rest of the meal – salad, veges and dip and cheese bread.
Dessert were these cute Frankenstein cupcakes that I made. The head is a marshmallow and the whole thing is covered in green frosting. They are pretty cute for a monster!
I just used a chocolate cake mix (shame on me) for the cupcake!
It was a fun evening and the best part was just spending time with my wonderful neighbors! We are so blessed to have such amazing neighbors!
Now off to carve those pumpkins we haven’t gotten to yet!!
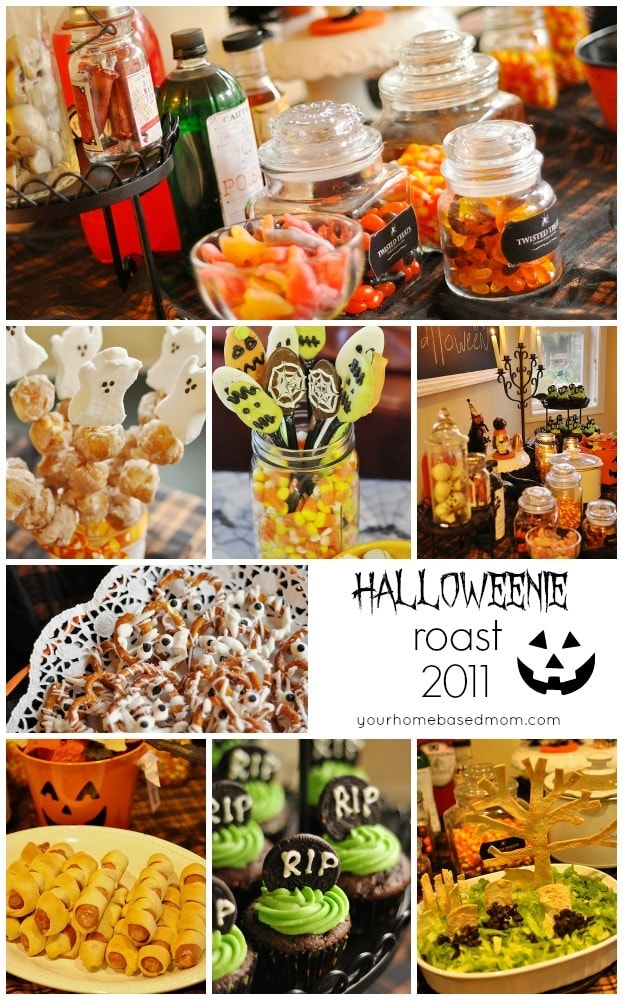
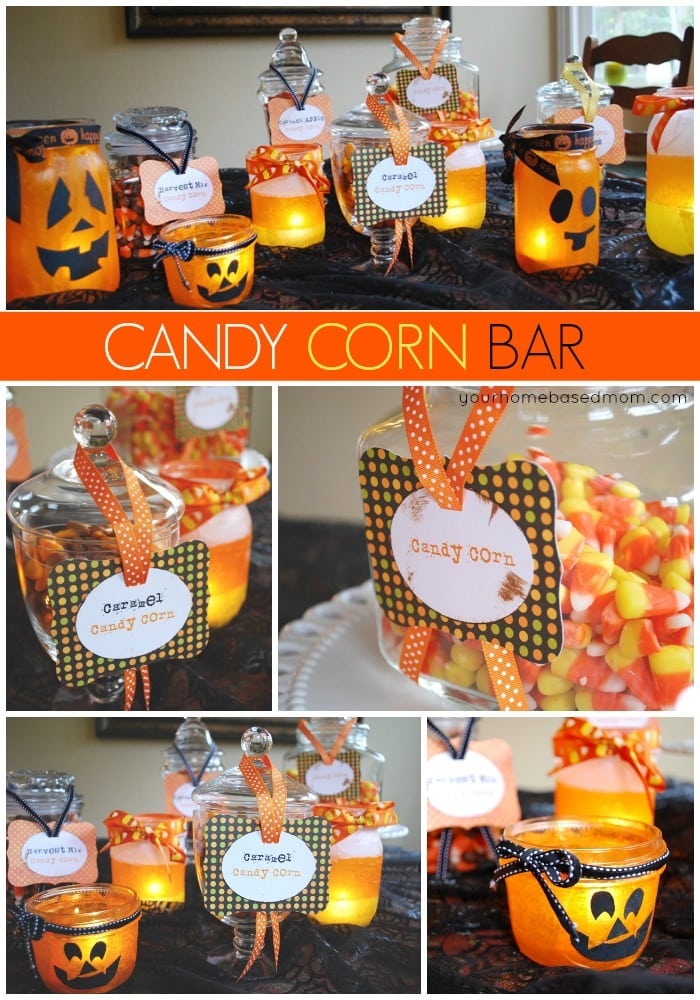
A Candy Corn Bar is a fun addition to your Halloween party – so many fun flavors of candy corn are available.
Now that my kids are all grown up and most of them gone from home I need to get my little kid fun fix with my neighborhood kids!
We have invited several of the neighborhood families over for a Halloweenie Roast on Friday night.
I have been busy working on a candy corn bar for the party. It turned out so stinking cute I couldn’t wait to share it with you.
Did you know there are flavored candy corn? I managed to track down several different flavors for our candy corn bar.
Candy Corn Bar Ingredients
Caramel candy corn
Caramel apple candy corn
Harvest mix.
Candy Corn Kisses (or whatever flavor you can find.
Feel free to add in any other Halloween/candy corn themed candy you can find.
I placed the different candy in an assortment of jars I already had. You can often find great jars at Goodwill too.
Be sure and label the different types of candy corn.
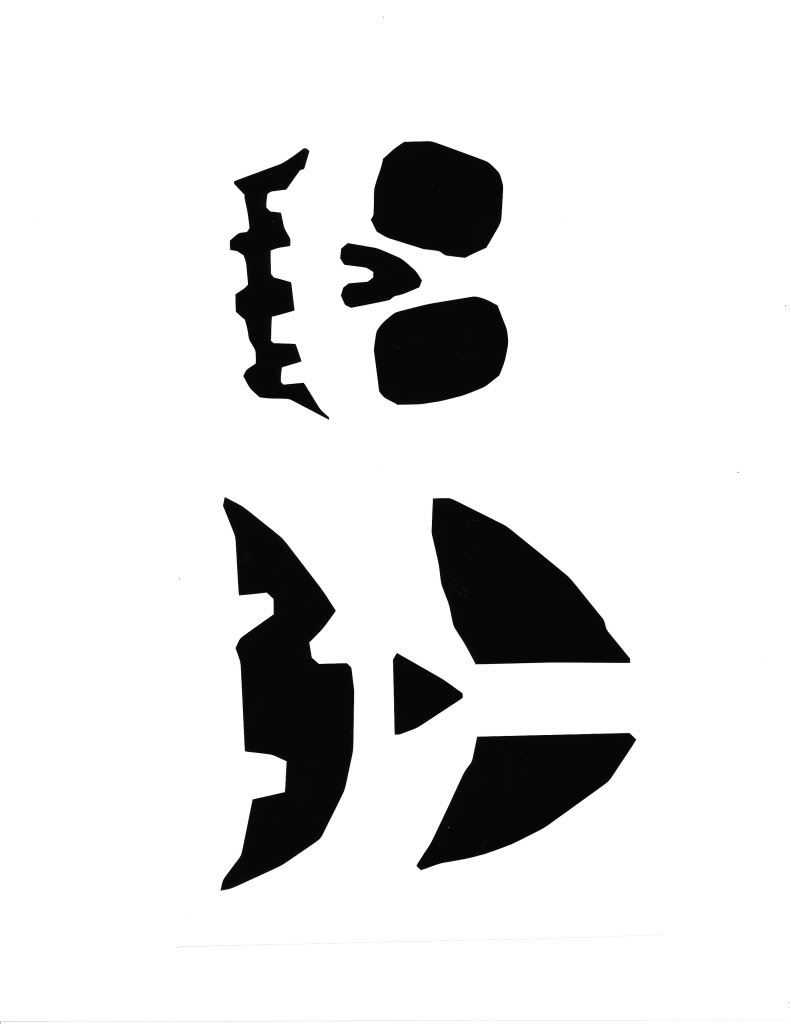
Mason Jar Jack-o-Lanterns
For a little mood lighting on the table, I pulled out some of my old canning jars that have been gathering dust and turned them into a cute lantern. Since I was going to be using them on my candy corn bar I turned some of them into glowing candy corn as well as jack o’ lanterns! Aren’t they cute?
I created the lanterns by using mod podge and gluing tissue paper onto the jars. The jack of lantern faces were cut out of black construction paper.
You can also print off the patterns for the jack o’ lantern faces here and here.
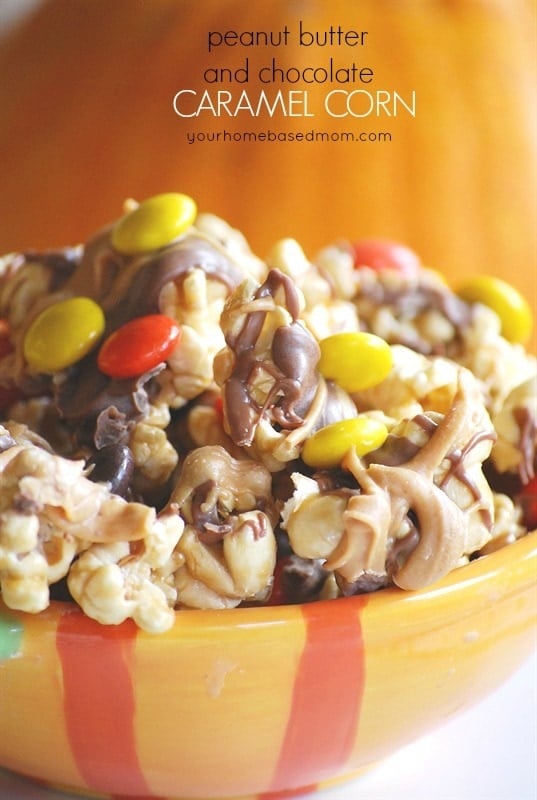
I decided to dress up the caramel corn a little bit this time. I have jazzed it up before with a white chocolate drizzle which was awesome. This time I decided to see what I had in my baking pantry.
I also love the combo of peanut butter and chocolate so I melted the peanut butter chips and drizzled them over the caramel corn and then melted the milk chocolate chips. Then I sprinkled on some Reese’s Pieces – can you really have too much peanut butter and chocolate??
The combo was awesome and looked Halloweenie too!
Next I decided to combine the white Almond Bark and Butterscotch chips.
It was amazing ! In fact it was my favorite and the one that disappeared first. So sorry college kids – you are getting just plain caramel corn!
Just pop up a batch of caramel corn and then see what’s in your pantry! Try my flavor combinations or make up one of your own. If you come up with a good one – let me know!
In 2006 I read the books Julie & Julia and My Life in France – both books about Julia Child. In fact my first introduction to blogging was with the book Julie & Julia.
This fall my friend Marsha and I went to see the movie based on the two books. We both loved it and left the movie craving Boeuf Bourguinon! We decided on the way home that we were going to have a Julia Child dinner party.
Marsha turned 50 last week (hope she doesn’t mind that I just told the blogosphere!) so I decided that her birthday was a perfect time to host a Julia Child dinner party.
First I had to get a copy of Mastering the Art of French Cooking – fortunately Costco had them in stock!
I discovered that reading one of Julia’s cookbooks is more like reading a textbook – you can learn a lot!
Her recipes are very detailed and fairly labor intensive. Let’s just say I spent A LOT of time cooking the two days before the party but it was worth it and fun!
To set the mood for the meal I decorated the dining room table with some fall decorations.
I got out the good china, silverware and crystal!
My friend Jane provided the appetizers. She put together a wonderful selection of french cheese, crackers, breads and a yummy fig and orange jelly to serve with it. There was also the Barefoot Contessa’s sun dried tomato dip!
We served appetizers on the kitchen island – everyone always loves to gather in the kitchen as I put the finishing touches on dinner. I also set up a little fall/Halloween vignette on the kitchen island to make it look festive.
Our first course was Soup a L’Oignon with Croutes au Fromage(French Onion Soup with cheese toasts.) It was delcious and one of my guests commented that it was the best french onion soup they had ever had and they’ve had a lot of french onion soup.
From there we moved onto the Boeuf Bourguinon. The Boeuf took about 5 1/2 hours from start to finish and was a fun dish to prepare. It tasted amazing too!! I served it over some small boiled potatoes. Because it uses stew meat it is a fairly inexpensive dish to prepare which is nice if you are serving a lot of people.
My favorite was dessert – no surprise there! I fixed the Reine de Saba (Chocolate and Almond Cake). The same cake you see in the movie. I have been dreaming about it ever since I saw the movie. I have to say it tasted as good as it looked – maybe even better!
The cake is made with pulverized almonds and only 1/2 cup of cake flour. I used Julia’s Creme au Beurre, Menagere recipe (Butter Cream I with powdered sugar). The recipe calls for 1 1/2 sticks of butter to only 2/3 cup of powdered sugar. It was so buttery that I added another 2/3 cup of powdered sugar. It was amazing!!! Julia sure liked her butter!!
After frosting, the edges of the cake are sprinkled with sliced almonds. It makes a beautiful presentation.
There are a lot of Julia knock off recipes out there on the web but if you want the real Julia you’ll have to pick yourself up a copy of Mastering the Art of French Cooking!
I have to agree with Julia when she said:
“It’s fun to get together and have something good to eat at least once a day.
That’s what human life is all about – enjoying things.”
I found a lot of enjoyment in preparing this meal for my friends but I found even more enjoyment in sharing it with them at my table! Good food and good friends – the perfect combination!
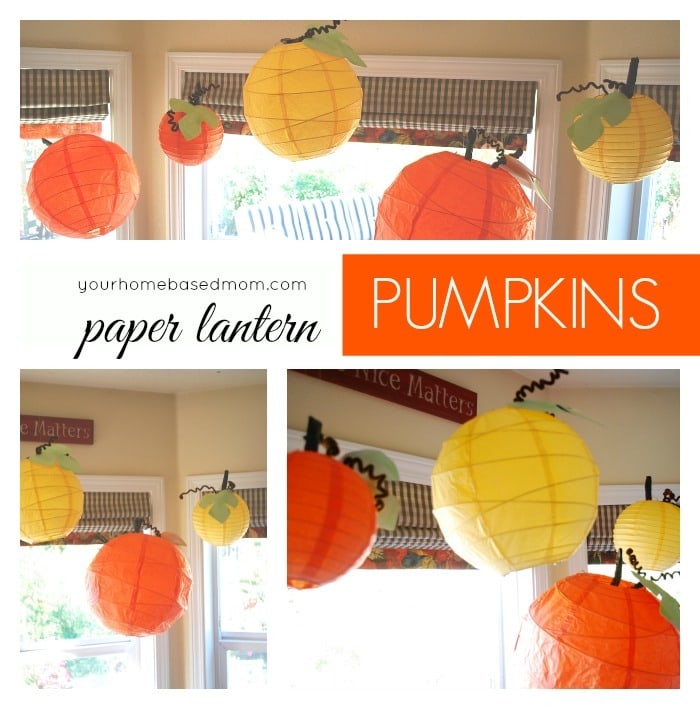
These paper lantern pumpkins are so easy to make with store bought paper lanterns
We are officially ready for Fall at the Wilkes’ house.
The candy corn is bought and the Fall holiday decor is in place.
Now before you are too impressed let me inform you that in order to put the Fall decor up I had to take down my Easter decor. Yes, those cute little Easter bunnies and baskets were still adorning my home until this weekend!
I could come up with a whole list of excuses for why they were still there but I’m not going to. I am going to show you some photos of my fun Fall decor instead.
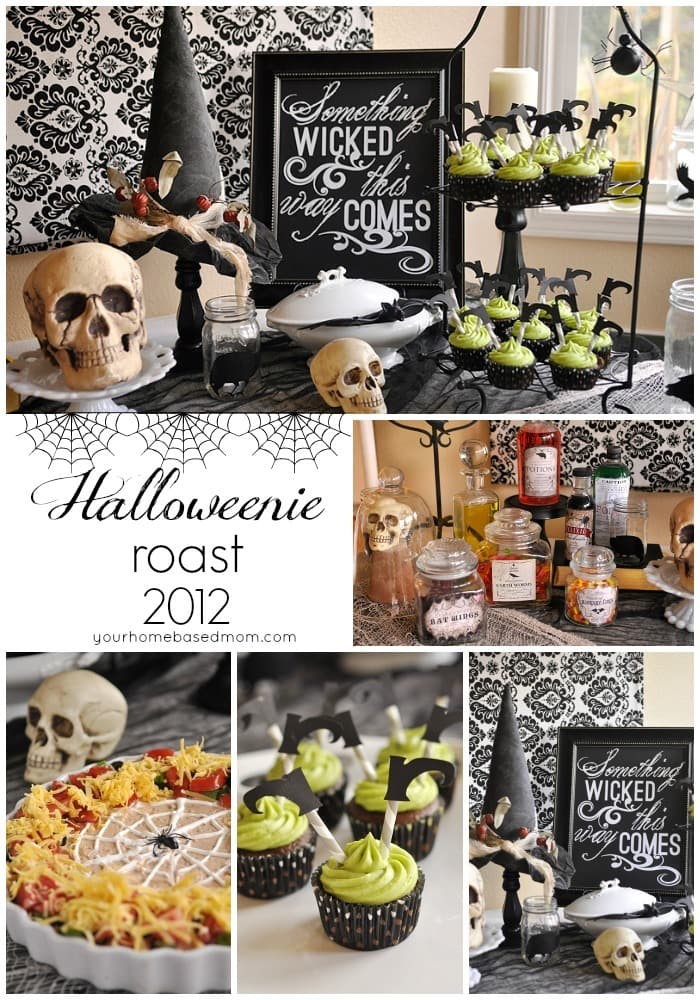
I have to admit I love decorating for Fall/Halloween almost as much as for Christmas. I tend to stay away from the scary, skeleton, bloody gore Halloween stuff and stick to the fun, cute whimsical variety.
A few weeks ago I saw a cute idea for turning paper lanterns into pumpkins over at Martha Stewart and I fell in love with them.
I now have a pumpkin patch floating in my kitchen nook – how cute is this!
I have started myself a little collection of old painted chairs and they came in quite handy.
I went to great lengths to get this fun little orange chair home from my weekend trip to the beach because I knew it would be a great addition to my Halloween decor.
And my green chair is the perfect spot for my little skeleton – I know I said I didn’t really go for the scary skeleton stuff but this guy is cute and besides that I made him!
Here is my front entry.
Even the little corner of my kitchen has some Halloween going on.
And in my family room I have some funky new pumpkins I bought at Tai Pan when I was in Utah last month.
For my mantle I wanted some black candle sticks. I found some brown ones at TJ Maxx for about $3.00 a piece and with a quick coat of spray paint they are now black and the perfect spot for my little pumpkins to perch!
Thanks for taking the tour! Are you ready for Fall?
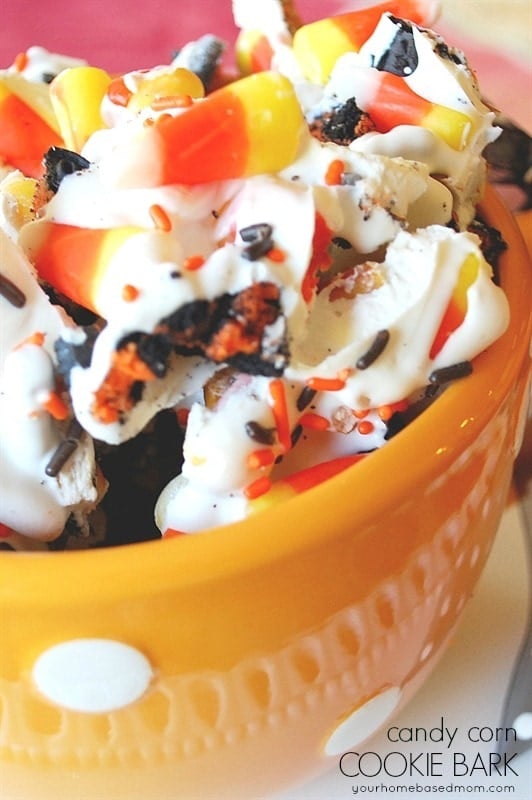
Candy Corn Cookie Bark is the perfect halloween treat for the big candy corn lover in your life.
Fall is here. I can tell because my furnace has turned on and there is candy corn in the store!
I have a bit of a love affair with candy corn! I won’t tell you how many bags I have already bought! I am not sure what it is about candy corn other than it is so darn cute! I love the shape, the color, the size, the taste – I just love everything about it.
I was in Target today and they had the cutest little Halloween costume – it was a piece of candy corn. If there was someone at my house who I thought would fit into it or wear it I so would have bought it but I think it was a size 2 Toddler!
I collect candy corn recipes. Yes, I have a file folder totally devoted to recipes containing, shaped like or resembling candy corn! One of my favorite candy corn recipes from last year was White Chocolate and Candy Corn Popcorn.
Today’s recipe is one I printed off last Halloween and never had a chance to share. I have been waiting an entire year to make Recipe Girl’s Candy Corn Cookie Bark!
Not only is it bright and colorful but it is yummy too!
The sweetness of the Oreos, white chocolate, and candy corn is a great combination with the saltiness of the pretzels.
The first step is to spread your broken up Oreos (I used the Halloween ones with the orange filling), pretzels and candy corn on a wax paper lined cookie sheet.
Melt your white chocolate (I prefer to use the round melting discs you can buy in the bulk food section. I found them at Winco or use Almond Bark) and pour over the top of the cookie mixture. Spread with a spatula if needed to get it all covered.
I used my spatula to push the outer edges in toward the middle.
While the chocolate is still wet sprinkle remaining candy corn and brown and orange colored sprinkles over the top!
Let the chocolate set. You may place in the refrigerator if needed.
Gently break bark into small pieces for serving and munching!
Store in an airtight container.
Candy Corn Cookie Bark Recipe
Candy Corn Cookie Bark
Cookie park topped with white chocolate and yummy candy corn.CourseDessertCuisineAmericanKeywordcandy corn cookie barkPrep Time15 minutesCook Time5 minutescooling time1 hourTotal Time20 minutesServings14 servingsCalories264kcalAuthorLeigh Anne Wilkes
Ingredients
14 whole Oreos broken up. I used the Halloween ones with the orange filling but regular will work fine
1 1/2 C pretzels broken into pieces. I used the small stick pretzels
1 lb. white chocolate almond bark or melts found in the bulk food section
1 C candy corn
brown and orange colored sprinkles
Instructions
Cover a large cookie sheet with wax paper
Spread broken cookes, pretzels and about 3/4 C of the candy corn onto the waxed paper
Place white chocolate in a container and microwave for 1 1/2 minutes
Stir and then microwave for another 30 seconds until melted and smooth
White chocolate melts faster and burns easier than chocolate
Drizzle the melted chocolate over the cookie mixture, spreading with spatula if needed to coat evenly
Sprinkle remaining candy corn and colored sprinkles over the chocolate while it is still wet
Do not let it harden
Place cookie tray into refrigerator until set and firm
This weekend I enjoyed a girlfriend getaway. I was able to enjoy a beautiful weekend at the Oregon Coast with my Beach Babe friends. I just had to share a few pictures of what we enjoyed this weekend – don’t drool on the keyboard!
Limoncello Cream Torte – we actually enjoyed this two days in a row – amazing!!! Anyone have a recipe for Limoncello Cream Torte to share? I want it!!
And then there was the yummy Chocolate Raspberry Truffle Pie.
And I didn’t get a picture of the amazing chocolate peanut butter pie we had too! We enjoyed these yummy treats at the Full Circle Cafe in Ocean Park, Washington. There is also a fun yarn shop attached to the cafe where we spent quite a bit of time too!
The title of this post is Pretty Pincushion not Pretty Desserts but it could be named that too!
One of my life philosophies is, if you have to have something, it might as well be pretty. For years I have always used one of those standard, boring red tomato or is it a strawberry shaped pin cushion – you know the one I’m talking about. Not too pretty is it….
Well, a few weeks ago it was my friend Meg’s birthday. I had seen this pattern for a pretty pincushion on a quilting blog I visit. I decided to make Meg a pretty pincushion.
Isn’t it cute!? But it looked a little lonely all by itself so I decided it needed a friend and I needed a pretty pin cushion so I made another one. One for Meg and one for me.
I have two costumes to make for Tessa for the school play she is in (She is Miss Minchin in Little Princess) so I am going to enjoy using my pretty pincushion a lot this week!
If you live in the Portland area and want a fun theater experience you might want to check out the Westview High School production of Little Princess. Westview does an amazing job with their productions. The show will run Oct. 22, 23 and 24th. There will even be a tea party on Saturday that you can buy tickets to – enjoy some yummy tea party treats (prepared by me!) and meet some of the characters from the show! A perfect mommy or daddy/daughter date. Boys can come too!
Email me or leave a comment if you’d like more information on getting tickets.
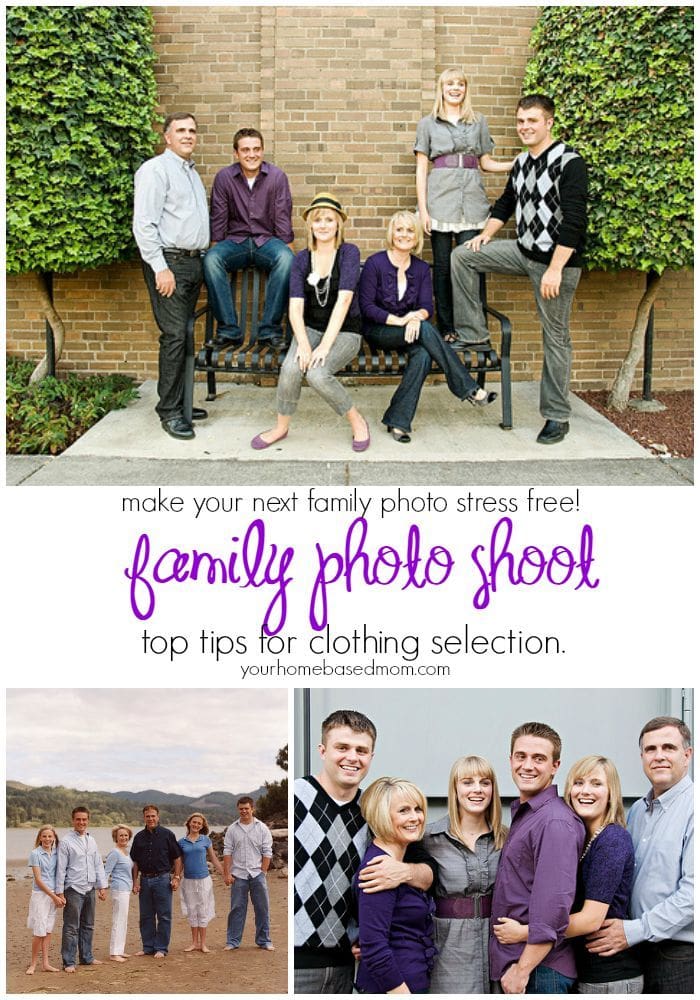
Believe it or not my favorite part of having a family photo taken is picking out what everyone is going to wear!
I look at it as a creative challenge. I have always loved working with clothes. In the 5th grade I learned to sew in 4-H and made the majority of my own clothes from that point on until I was married with a couple of children! I loved my summer job of working in a dress boutique and then decided to carry on my love for clothes when I majored in Clothing & Textiles in college! And having been a Creative Memories consultant for 19 years I have seen A LOT of family photos!!!
Over the years of clothing our family for numerous family photos (We have 16 different family portraits hanging in our Wilkes Family Gallery) I have learned a few tips and techniques for making everyone look like a cohesive group without looking matchy, matchy and boring!
The first step is to choose a color scheme.
I usually base this decision on what the fashionable colors are that year or the location of the photo shoot. This year purple and grey are the in colors so I knew I could easily find clothes in those colors and it’s a great combination! I used the purple and grey with black and denim. I really consider denim to be a non-color, a neutral. We were also having an urban background for our photos so I thought those colors would work well.
Choose a formal or casual style of clothing – mixing styles does not work well (i.e. dad in a suit and son in a t-shirt and jeans) I usually let the location of the photo shoot help determine the style of clothing. When we had our family photo taken at the beach we went with a casual jeans, blue and white color scheme.
When we had our photo taken outdoors with the fall leaves we also went casual with earth tones. (o.k. so the striped vest on me is pretty ugly!)
We tend to leave the more formal attire to the studio shoots.
Avoid sharp contrasts in clothing and match-matchy clothing – i.e. everyone in black t shirts and khaki pants. By adding in the small patterned sweaters on the girls in the photo below we softened the contrast of the black and khaki. Having everyone in the same style black shirts and khaki pants is slightly boring and it also causes the eye to go to the bodies and not the faces. Adding in a small amount of texture and small pattern can break up the monotony and create some interest. Although everyone is in black and khaki in the photo below it is in different combinations. I’m in all black, Jim and Logan are both in black pants and khaki sweaters but they are different styles and textures. The girls are in matching outfits but since there are only two of them and four of us – it works without looking overly matchy, matchy.
Select a foundation piece. That foundation piece is usually what I am going to wear for the picture – mommy needs to look good! In this year’s picture we had a combination of denim, purple, grey and black clothing. Tessa’s outfit is grey and Jim’s shirt is grey but a lighter shade and a very tiny check. I am in purple as is Logan and Cali but they are varying shades of purple which creates interest as does the ruffle on my sweater but without being overwhelming to the photo and distracting form people. Clark’s argyle sweater, while being a larger pattern, works well. I don’t know what it is about argyle but it really works.
The fact that we were in an outdoor urban environment (we are actually standing in front of a dumpster!) also lent itself to more interest and pattern in the clothing.
The Squint Trick: one trick I use to make sure nothing I have selected for anyone to wear is going to overpower anyone else is to lay it all out on the bed and then squint. It’s a trick I use when selecting fabric for a quilt too. You want the colors to blend and compliment one another without being overpowering. If anything sticks out while squinting you want to get rid of it – find something else.
When the children were younger and even a little older I picked out what everyone wore in our family photo. O.K., I admit it I have pretty much picked out what everyone was going to wear in every family photo we have ever had taken! But this year I wanted the photo to be more reflective of their individual personalities – the people they had become. Although I did retain veto power!
This required a little bit more work on my part because I had to take them each shopping to pick out what they were going to wear. A trip to Forever 21 took care of Tessa. Her highly developed fashion sense is reflected in the cute little cream colored skirt she put under her shirt, over the top of her jeans and the big wide purple belt shows off her teeny, tiny waist! Clark picked out his sweater when we were at H&M in Seattle. I did pick out Jim’s shirt from Eddie Bauer and Logan’s from the Gap. I needed one of the boy’s in a purple shirt and there was no way Clark was wearing purple. Logan, my more cooperative child, liked the shirt! Cali was a bit more of a challenge. It took numerous trips to various stores before we nailed her selection down. We threw the yellow hat in at the last minute for fun because it is so reflective of Cali’s fun personality. I thought it worked great in the photos!
Avoid overexposure of skin. Remember that the most important feature of a family photo is everyone’s lovely face! Your eye is automatically attracted to flesh so avoid low cut clothing and sleeveless tops. You want to keep people’s eyes on the faces and off those other areas! Exposed flesh makes you look bigger so keep that in mind too!
Large Group Tips – another consideration in clothing selection is the number of people in your photo. For a family photo like ours you can add in some pattern without it being too distracting. If the family photo was a large group of people – more than 8 or so, numerous people in prints or patterns could be extremely distracting. For a larger group I would go with variations on a theme – everyone in the same color scheme but just vary the shade/tone of the color and the style of the clothing. Don’t put everyone in white polo shirts and jeans – instead have some people in white polos, white button downs, frilly white blouse with varying shades of denims. Even adding in a few white bottoms in a skirt etc. with a white or blue top will create cohesiveness without distraction for a large group.
Don’t forget your shoes. They will show in some of the photos and you want to make sure they coordinate with your outfits.
Remember – darker colors are more slenderizing than lighter colors!
Also avoid any type of writing, logo etc. on a shirt. The first thing your eyes will see is the word GAP running across little Jimmy’s chest!
I hope these tips help the next time you have a family photo taken.


