Feeds:
Posts
Comments

Archive for October, 2011

Halloweenie Roast – 2011

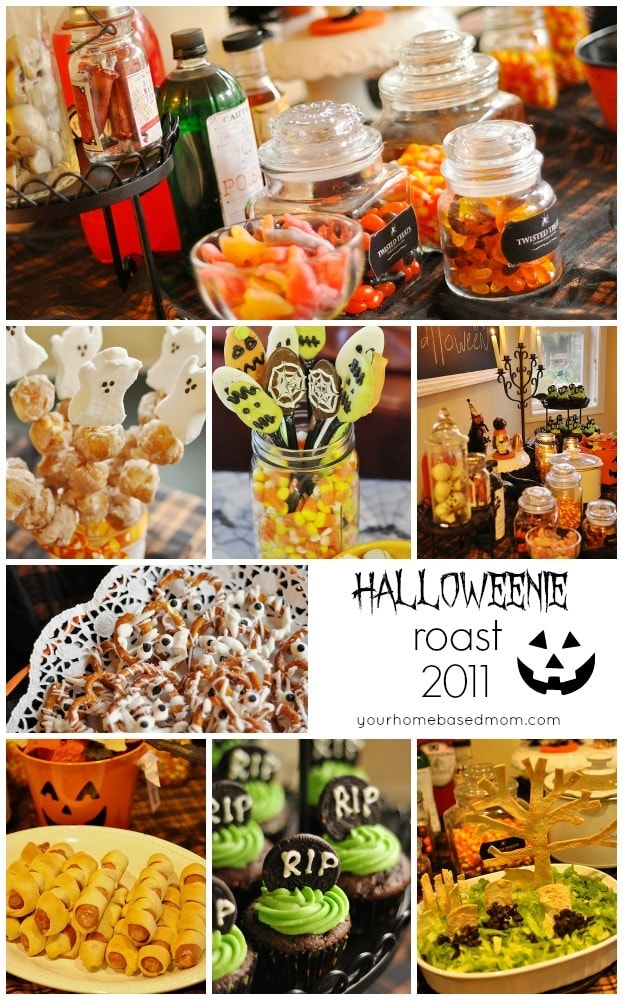
A Halloweenie Roast is a fun way to celebrate!

Halloweenie Roast 2011

I pulled out my trusty old framed chalkboard and Halloween pennant banner.  My fun little black bird cut outs came from the Dollar Store.

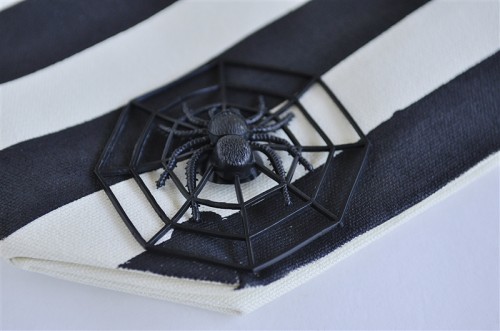
I reused a lot of the things from last years Halloweenie Roast 2010 so set up was pretty easy.  I just basically pulled out all my black and orange stuff!

Of course a Halloweenie Roast had to have lots of hot dogs and sausage.  Thanks to Johnsonville for supplying us with lots of yummy flavors for the evening.

Nothing like a sausage cooked over a real fire!

There were also some Mummy Dogs.  A hot dog wrapped in a breadstick!  (I used the Pillsbury canned breadsticks)

I am always amazed by how fast those Mummy Dogs disappear!  We also had a candy corn pizza (pizza that looks like candy corn, doesn’t taste like it!) but I didn’t get a picture of it.  Next year!

I made a batch of queso dip and served it with these fun Halloween shaped chips I found at Winco.

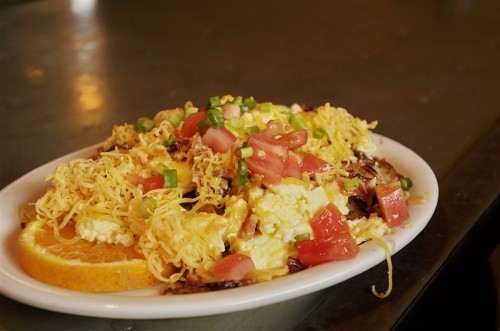
There was also my yummy Autumn Apple Salad.

When my neighbor asked what she could bring I sent her a link to this and asked her if she was up for a challenge.  She was and she exceeded the challenge!  What a fun way to serve 7 Layer Dip!!  A graveyard!

The tree and tombstones are cut out of tortillas and then baked.  How cute is that!

Of course there were plenty of sweet treats too including some fun Oreo tombstone cupcakes.

There was a Halloween Hot Chocolate Bar too.

Which of course included hot chocolate Halloween spoons!

And some doughnut hole skewers.

There were some mummy pretzels too.  I saw the idea on Pinterest but decided to dress them up a bit by using my cinnamon toast white chocolate pretzel recipe.  I made my own googly eyes using this googly eye tutorial.

And of course there was plenty of candy!

We were well protected that evening.  The Secret Service was there.

It was a good night for Cardinal fans too!

Happy Halloweenie!!

Read Full Post »

halloween popcorn

My love of creamsicle and white chocolate took over today.  I decided I needed.  That would be NEEDED to make some Halloween Popcorn.  The first version I made and shared a few years ago is white chocolate popcorn with candy corn.  I think I could eat anything if it was covered in white chocolate and had candy corn in it.  Maybe even a potato!  (For those of you new to the blog, I do not eat potatoes!)

I wanted the new Halloween Popcorn to look Halloweenie so I figured I better use something black/brown and orange.

How to Make Halloween Popcorn

Dark chocolate was the first choice and then I decided to add in some of those orange slice candies.  I found mine in the bulk bins at Winco.  I decided if a little orange was good, more was better so I also drizzled some orange colored and flavored candy melts over the top.  A sprinkle of Halloween colored sprinkles added an extra touch!

There are two ways you can add the orange flavored drizzle.  You can buy the white chocolate/vanilla melts and add some orange coloring and flavoring.  You just need to make sure that they are both oil based.  Regular food coloring is water based and will cause the chocolate to “seize” up.  Meaning it will get hard!  I purchased my oil based food color (it is specifically for candy) at our local cake decorating store.  I used my Wild Orange Essential oil but they also have oil based orange flavoring at the cake decorating store.

An easier way would be to buy the orange Wilton Melts and add the orange oil to it or you could just leave the orange flavor out but that extra bit of orange in the drizzle is really nice!

First I popped about 2/3 cups of popcorn in my air popper.  I did it in two batches.

Next you want to cut up your orange slices.  I cut each slice into about six pieces.  I think it is easiest to use scissors.  Just give them a spray of vegetable spray and the candy doesn’t stick too bad.

I then melted 1 lb. of vanilla melts in the microwave.  Just pour the melted chips over the popcorn and stir until well coated.  Add in the orange slices and stir some more.

Spread the mixture onto a cookie.  I used two cookie sheets and make a nice layer.

Then melt your dark chocolate melts and your orange melts and drizzle over the top of the popcorn mixture. Sprinkle with some Halloween sprinkles.

Allow the chocolate to set up.  If you are in a hurry, stick it in the refrigerator.  I bet you can’t wait until it’s set up to eat some!!

Halloween Popcorn Gift Idea

It is the perfect treat to package up in little cellophane bags and give out to friends.

That is if you don’t eat it all first!

Now if you happen to live in Oregon and just happen to be an OSU Beaver fan, this is the perfect game day treat!

Try these other fun Halloween ideas:

Halloween Snack Board

Candy Corn Quesadilla

Halloween Hot Chocolate

Halloween Sundae

For all of my other favorite kitchen products and tools visit my Amazon Store.

Did you know I wrote a cookbook?  Check out the Holiday Slow Cooker Cookbook for 100 delicious recipes.

Halloween Popcorn Recipe

Ingredients

  • 1 lb. plus 1 cup vanilla melts or 1 lb. vanilla melts and 1 cup orange melts
  • 1 cup dark chocolate melts
  • orange coloring oil based
  • orange oil
  • 16 Cs popped popcorn
  • 2 C orange slice candy cut into pieces
  • Halloween sprinkles

Instructions

  • Pop popcorn and remove unpopped kernels
  • Slice orange slices into six pieces
  • Spray scissors with vegetable spray to keep them from sticking
  • Melt 1 lb. of vanilla melts in microwave and pour over popped popcorn
  • Stir well to coat
  • Add in orange slices
  • Stir again
  • Spread mixture onto one or two cookie sheets into a nice even layer
  • Melt dark chocolate melts and drizzle over popcorn mixture
  • Melt orange melts and add orange oil
  • Or melt vanilla melts and add orange oil and oil based coloring
  • Drizzle over popcorn
  • Add Halloween sprinkles if desired.
  • Allow to set up and then break into pieces.

Read Full Post »

It is that time of year!

Pumpkin Patch time!

One Pumpkin Patch we have been visiting since our children were little is The Pumpkin Patch on Sauvie Island. They claim to be Portland’s original Pumpkin Patch and they may just be having been around for over 40 years.

Located at 16511 NW Gillihan Rd., Portland, OR 97231 on Sauvie Island they are open daily. Check their website for specific days and times.

At The Pumpkin Patch you ride free hayride out to the pumpkin fields.

There is lots to do at The Pumpkin Patch. There is the cow train, the gift shop, the animal barn, the produce shop and the cafe.

Now that my children are older they much prefer The Maize to the animal barn or cow train!

O.K. – well, maybe not the cow train!

The Maize is open September and October and covers over five acres. Each year the Maize has a different design and this year is the year of the Timbers!

There is an admission fee to the Maize:

Regular Adult $7
Regular Kids (6-12) $5
Regular Senior $5
5 and Under FREE

There is some signage at the Maize that you are going to want to take note of and take seriously.

Even if it hasn’t been raining – take boots! You’ll be sorry if you don’t!

There are two Maizes this year. If you are looking for a bit spookier experience you will want to check out the Haunted Field of Screams.

This Maize is open limited days and hours so be sure and check out the information on the website.

Happy Pumpkin Picking!

Let us know what your favorite pumpkin patch is in the Portland area by leaving a comment below!

Read Full Post »

Trick or Treat Bags

Trick or Treat Bag

I am in Utah this weekend visiting the kids and seeing Cali’s show – The Hundred Dresses at BYU.  We are lucky to have lots of family in the area so I always have somewhere to stay since staying in a college apartment isn’t always the best choice!  This time I will get to see some of my favorite little people – 3 of my  nieces and nephews!  Often I like to take a little treat or gift along with me.

When I saw these cute trick or treat bags over at eighteen25, I knew what I would be taking this trip!

I changed the bags up a bit and instead of making the bag I bought some bags at Micheal’s Craft store.

I also used blue painters tape to make my strips.  Using a ruler I put three rows of tape down, one inch apart. I used black paint and some painting medium to make the black strips.

I used about 2 part paints to 1 part painting medium.

Be sure and put some paper inside the bag so your paint doesn’t soak through.

Be sure your paint edges are all the way down so paint doesn’t sneak underneath!

Allow the paint to try a while before removing the tape – about 5-7 minutes and then remove the tape.

You don’t want it totally dry but if it is too wet and you remove the tape you may end up with this a blob of paint!

No worries I just covered it up with a spider web I got at the Dollar Store!

Two of the bags are for girls and one for a boy so I needed to change it up on the boy bag.   I thought a spider web and a bat were just the right touch.

I just sewed right through the rubber onto the bag.

I got to girly up the other two.  I stamped them with the word Boo using my rubber stamps and then added a fun flower pin I found in the bins at Joanne’s.  I also made some little rolled felt flowers to embellish it with.

I just cut two circles out of felt.  One I cut straight and the other I cut with a wavy line.  The circles are about about 4-5 inches across.

I then just starting cutting them in a spiral motion.

Just around and around.

Then you start rolling up the long piece of felt you have created.  Start with the outside end.

When you reach the end turn it upside down and add a bit of hot glue.

Then just lay the remaining felt on top of it – watch out you don’t burn your fingers.

The flowers were hot glued right onto the bag.  For the girls I also added a row of black pom poms along the top of the bag.  I attached the pom poms with my sewing machine.

Who wouldn’t want to go trick or treating with such a cute bag!  I think I need one too!!

Read Full Post »

Halloween Home Decor Tour

I have to admit I was tempted, only for a minute, not to put up my Halloween decor this year.  It was during one of my “feeling sorry for myself because I am an empty nester” moments.  I must admit it is not quite as fun to decorate when there are no kids around to enjoy it.  But I decided I enjoy it so that is a good reason to decorate.  We will also be hosting our annual Halloweenie Roast and how could I do that and not have my decorations up!!

So I decorated.

The downstairs is officially decked out for Halloween.  The nice thing is, the majority can stay up after Halloween , right into Christmas.  I just remove a few of the Halloween specific items!

Here is the entry way.

I picked up the hat stand at Goodwill this year – it is actually a toilet paper holder!  I made the Halloween pennant banner last year.

Mr. Skeleton sits on a chair in the entry way too.

This little table was a Goodwill find and it is patiently waiting for me to refinish it.  In the meantime it is the perfect spot for a little Halloween decor.

In the family room my newly painted/refinished sofa table (I don’t even have the hardware on it yet!)
was the perfect spot for a little decorating.

I picked up the pumpkins last year on one of my trips to Tai Pan in Utah!

I also added a few Halloween touches to the fireplace mantel in the family room too.

Now to the dining room.  I was excited to decorate my newly painted buffet.

The black candlesticks I found at Goodwill and spray painted were the perfect place for some small pumpkins.  My spider web tiered serving piece made a great perch for the black birds I found at the Dollar Store.  The little candelabra also came from the dollar store and the Pumpkin Lady was a gift.  The fabric is just some yardage I picked up on clearance last year after Halloween.

I filled the cake plate that sits on my dining room table with a berry garland I had in my stash.

My inspiration for my mantel in my living room was a Pottery Barn catalog.  I headed to Home Goods and found everything I need to create it for a lot less money.

I just filled containers I already had with more berry garland and acorns

Just about every container gets filled with some kind of fall decor –

And here is the kitchen table…..

Well, that takes care of just about every flat surface I have downstairs in the house!

Happy Halloween?  Do you decorate for Halloween?

Read Full Post »

A Great Parenting Quote

Here’s a great parenting quote for you.  This pretty much sums up my parenting philosophy.

To my children:  because I love you….

parenting quote

Do you have a favorite parenting quote?

Source: joelfelix.com via Leigh Anne on Pinterest

Read Full Post »

Fall is definitely in the air here in Portland. The  furnace is kicking on most mornings. I love that sound and smell!

One of our families fall activities is the Portland Nursery Apple Tasting Festival.

This year’s Apple Tasting Festival will be held the weekends of Oct. 14, 15 and 16 and Oct. 21, 22, and 23rd from 10 a.m. to 5 p.m. at the Portland Nursery which is located at 5050 SE Stark, Portland, OR 97215.

Portland Nursery Apple Tasting_0001

You have the opportunity to taste dozens of different varieties of apples and pears and pick your favorites and it’s free!

Portland APple Tasting_0001
Portland APple Tasting

The best part is that after you have selected your favorites all of the varieties of apples offered for tasting are for sale at the nursery for a great price!

Portland Nursery Apple Tasting_0002

And there is a lot more to do than just taste apples!

Check out their website for a list of scheduled activities. Things such as live music and a scarecrow contest are on the agenda for this year as well as watching apple cider being pressed!

Don’t forget your camera because there will be some fun fall photo shoot opportunities with all the pretty flowers and pumpkins!

There are also some yummy apple goodies to purchase and enjoy – there is fresh pressed apple cider and apple strudel too.

Portland Nursery Apple Tasting

Start off your Fall fun with a trip to Portland Nursery Apple Tasting Festival!

Read Full Post »

Easy Sew Paper Banner

Easy Sew Paper Banner

This last week I got to play Aunt Leigh Anne for a few days.  Jim called me Grandma Leigh Anne but I think I prefer Aunt Leigh Anne.

My friend Meg had her third baby.  I was honored that she entrusted me with her two other darlings for two days while she was at the hospital.

We had all kinds of fun and made lots of fun messes too!

Every baby and new mom deserves a welcome home banner so we pulled out my Cricut to make one to welcome Baby Oliver and mom home.

The letter font is from the Doodletype cartridge.  I cut the letters from an assortment of different blue/green papers.  The letters are 7 inches tall.  I just used  scotchtape and taped the baker’s twine right to the back of the letters.

I also added a fun little shape garland too.  I used the leftover scrapes of paper and some of my paper punches and cut out different shapes.

I used extra heavy duty thread.  It is thread that they sell to sew/hem jeans so it is heavier than normal thread.  Then I just sewed right through the middle of the paper shape.

Leave couple of inches of thread between each shape but just keep feeding them through the machine.

Not only do they make fun garlands the are a fun way to dress up a package or gift.  After they open the package they can hang up the banner – two gifts in one!

It also looks cute wrapped around a print I framed for Baby Oliver’s nursery.  Print is from Sarah Jane Studios.  One of my favorite children’s illustrators.

And I couldn’t resist wrapping it around one of my pretty blue mason jars too.

Here’s another fun version we made for Tessa’s dorm room.  A little reminder of home.  I went to AAA and got a map of Portland.  I then used my circle punch and punched out parts of the map that meant something to her – where we have lived in Portland, her school, favorite shopping spots.  All spots she would recognize.

It brought a piece of home to her new dorm room.  We found the Portland banner at Powell’s books in Portland and then one of my sweet blog readers made the vinyl quote for her room.  Thank you Mary Kathryn!!

Paper banners are fun and easy to make and an inexpensive gift.

The best part of playing Aunt Leigh Anne though was getting to capture the magical faces of Owen and Addy when they met their new baby brother for the first time!

Welcome Baby Oliver!

Read Full Post »

The Tin Shed – Portland

We are going to make one more stop on NE Alberta Street, at least for now. This area of Portland has become my new favorite. So many places to explore and great places to eat.

The Tin Shed is one of them. As stated on their website:

Our goal is to give the food a good ride from farm, to grocer, to the Shed and to you.

And they do just that with the freshest local ingredients they can find.  They are open for breakfast, lunch and dinner but I have only had breakfast there but plan on returning for dinner.

The Tin Shed is rather small but does have covered outside seating but if the weather is cold and rainy plan on a little wait.

But your wait will be rewarded with this – The Fetch!

The menu calls it Stacked Goodness.  It is a combination of a crisp potato cake topped with a bacon and egg scramble, covered with Tillamook cheese, tomato and green onion.  So good!

And this time I did eat the whole thing!!

Here is my version minus the tomatoes!

Their menu is entertaining too.  Whoever wrote it did a great job coming up with names for all the dishes – Tummy Warmer, Belly Pleaser, Everything Naughty, Everything Nice.

Check it out – let me know if you do!

Read Full Post »

Pumpkin Spice Steamer

Make a pumpkin spice steamer just like your favorite coffee shop that is just as delicious, but costs a whole lot less!

Pumpkin Spice Steamer with Caramel Sauce in a tea cup

Today I am sharing my favorite Fall beverage and something else to put that yummy caramel sauce on.  I always know it is Fall when Starbucks starts serving their Pumpkin Spice Steamer.  It gets a little expensive going to Starbucks on a regular basis so I decided I needed to figure out how to make my own at home.  It wasn’t hard.

I made a trip to Cash & Carry and picked up a bottle of this….

bottle of Torani pumpkin spice syrup

It doesn’t taste exactly the same but close enough!

Then you need some milk, I’m a 2% girl.  And a pretty cup of course!

frothing milk in a mug

I heat my milk up in the microwave and then I use my little frother thingy.  I picked it up at Cost Plus World Market but I have seen them at kitchen shops.  It swirls and whirls the milk and adds foam to it.  Just like Starbucks.

mug of milk with a frother

My frother is battery operated.

Then the crowning glory.  Some whip cream and caramel sauce!

pumpkin spice steamer with caramel sauce

Starbucks doesn’t put caramel sauce on theirs – that is my special touch when I am feeling like something extra special.

So no real recipe here – just pumpkin spice syrup, milk, whip cream and a little caramel sauce.  Welcome to Fall!

Read Full Post »