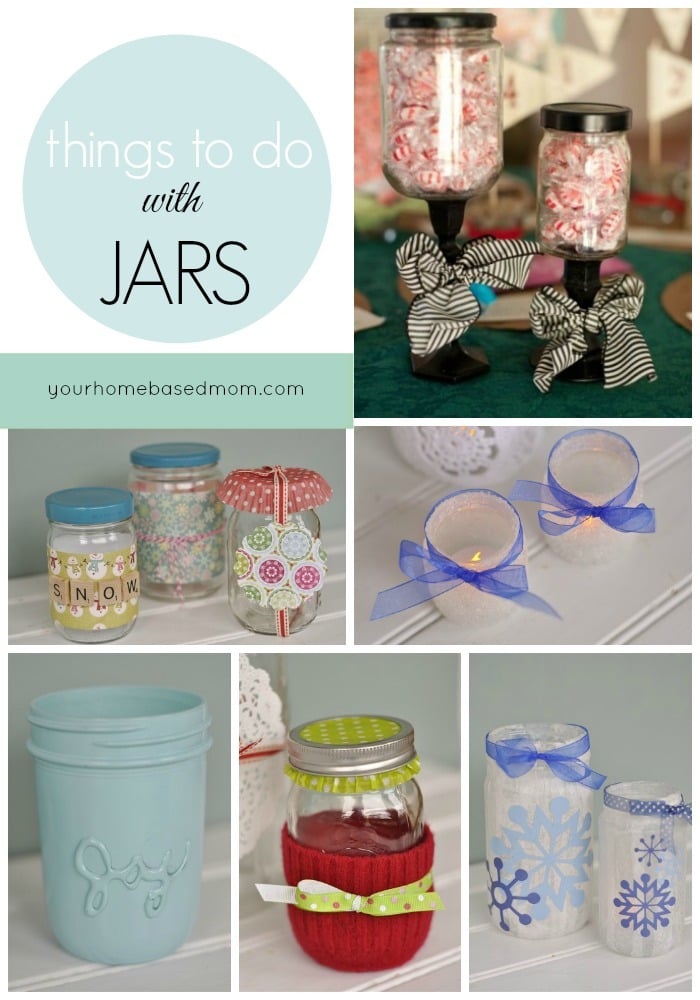
If you missed the fun jar ideas I shared yesterday be sure and check out more jar ideas here.
One of the ideas I shared at the class makes cute and easy Thanksgiving table decor. You can also use the idea to make place cards for everyone at the table. I am listening to the book House at Riverton on CD and got a kick out of this statement about placement at the dinner table:
“The importance of placement, Nancy advised, could not be overestimated. Indeed, according to her, the success or failure of a dinner party hinged entirely on the seating arrangement. Evidently Lady Violet’s reputation as a “perfect hostess”, rather than merely a “good one,” resulted from her ability to first invite the right people and then to seat them prudently, peppering the witty and entertaining amongst the dull but important.”
Hopefully we are all one of the witty and entertaining!!
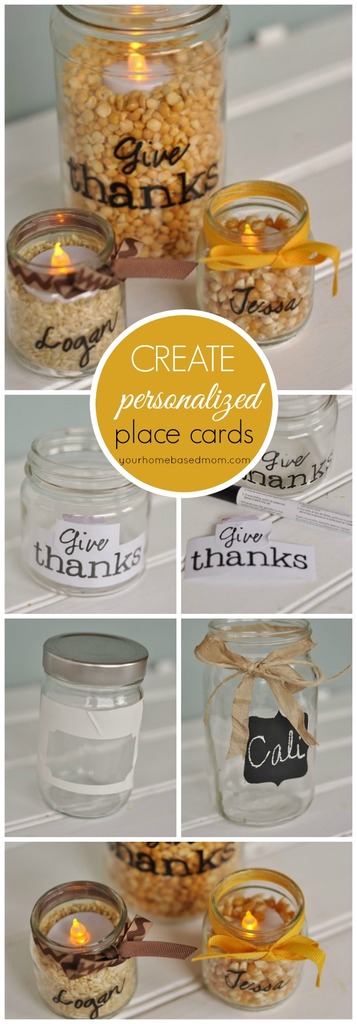
I used baby food jars (thanks to my friend Paige for supplying them) for my placecards.

I used a paint pen to write the names on the outside of the jar and then filled them with things from my pantry – popcorn and wheat! A touch of ribbon and a candle and they are ready for the Thanksgiving table. Because real candles aren’t allowed in the church where I taught the class I used the battery operated ones from the Dollar Store.
I also made some centerpiece jars using the bigger size jars. This one is filled with yellow split peas from the bulk section of the grocery store! 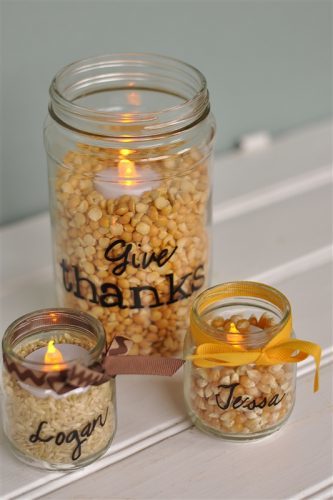
Since I don’t have such pretty handwriting I picked some pretty fonts on my computer and printed out the words which I then taped to the inside of the jar.

Using some paint pens I picked up at Michael I just drew over the letters onto the glass.

So easy!

Then just fill your jar with whatever you want.
Another fun idea for placecards at a table is to paint a mini chalkboard onto a jar.

You can leave the jars empty or fill them with something fun. If you didn’t add the ribbon you could use them to serve your beverage. The great thing about this one is that it is totally reuseable – just erase the name and you are ready to go for the next party.
I used my Cricut to cut out a label shape. I used the negative image, what was left when I removed the label.

I cut the label out of white contact paper so then I just removed the back of the negative image and attached it to the jar, being sure to rub the edges down nice and tight.

I then gave it about 3 coats of chalkboard paint (the brush on kind, not the spray paint version) I bought mine at Home Depot.

After it dries for a while CAREFULLY remove the contact paper. If any paint has seeped underneath the paper, just use an exacto knife or your fingernail to scrap it off. I added some ribbon and twine and a name! 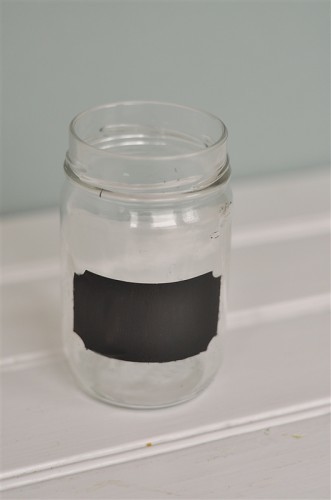
Next up – some fun treat ideas to fill your jars with!