I am in a banner mood.
Last week I shared this fun Valentine banner.
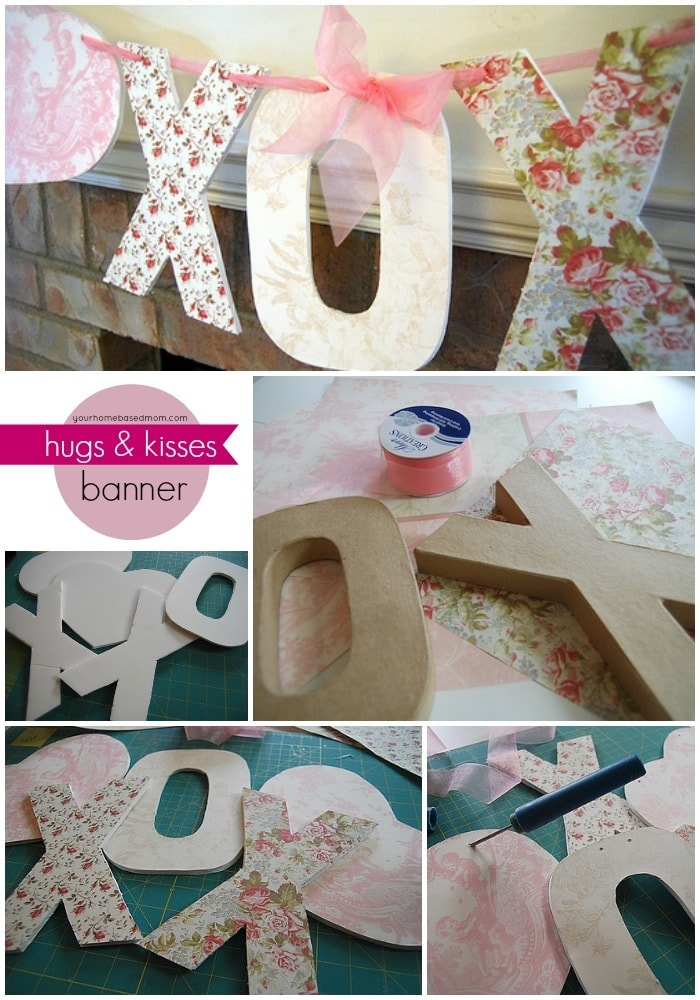
This week my Camp Craft Ladies and I are getting together and we needed a craft to make. I saw this darling Hugs and Kisses Banner over at My Romantic Home and since I seem to be in the banner mood I decided it was perfect.
I thought it would be a good idea to try it out first before the Crafty Ladies got together.
I got a little carried away. Not only did I put together one banner – but I made three! I decided that in addition to the Hugs and Kisses and a Love Banner that I needed a banner for my new Word for 2009
Here is my new Joy banner….

I am going to hang it in my office.
I put together a little tutorial on how I put together my 3 banners. Give it a try!
Step One:
I purchased brown paper covered letters from Joanne’s for the words I wanted to use. You could draw your own letters or print them off on the computer too. Mine were on sale for $2.00 a piece and I figured I would use them for something else sometime. You will also need coordinating scrapbook paper, foam core board, spray adhesive, a SHARP exacto knife, a self healing cutting mat and ribbon. I was excited when I found the exact paper My Romantic Home had used at Michael’s. I LOVE that pink toile paper!!

Step Two:
Using a pencil trace your letters onto the foam core board. I just made my own pattern for the heart.

Step Three:
With your foam core board on top of your self healing mat use a SHARP exacto knife to cut out your letters. I highly recommend putting a brand new blade into your knife before you start. It will make it so much easier. You will get a cleaner and more even cut – especially important on those curved letters. I learned this from experience!

Step Four:
Using your spray adhesive (do this in the garage or outside) spray the front side of your letter and place in face down on the wrong side of your paper. Rub to make sure it is adhered.

Step Five:
Using your SHARP exacto knife cut out around the letter/shape.

Step Six:
Using an ice pick or other sharp pointed instrument poke a hole through each letter for the ribbon. I use the ice pick to push the ribbon through each hole too. Depending on where you will be hanging it will determine the length of your ribbon. Be sure and leave enough on either end to attach it to something and tie a bow.

Step Seven:
I added a bow to my O because I tore the paper a little and it covered up the mistake! Hang banner and enjoy!!


I will be taking one of the two Valentine banners with me to Utah next week when I go to visit the college kids. Don’t you think it will be darling in Cali’s dorm room? (don’t really think the boys want one for their apartments)
Which one do you think she would like. Cali? If you are reading this – let me know which one you want!
Here’s the love one.

Note: On my Joy banner I used a Distress Ink pad to distress the edges. Just rub a sponge onto the ink pad and then rub the sponge around the edges of the letter.
Happy Crafting!!

Leave a comment